
Master fragrance load calculations, build balanced custom scent profiles, and learn reliable methods to reduce soy frosting and get smooth, glossy finishes.
Small paws. Big project plans.
If you have ever lit a pretty jar candle and watched it dig a little crater straight down the middle, you have met tunneling. It is frustrating because the candle can smell great and still burn badly, wasting wax along the sides that never gets a chance to melt.
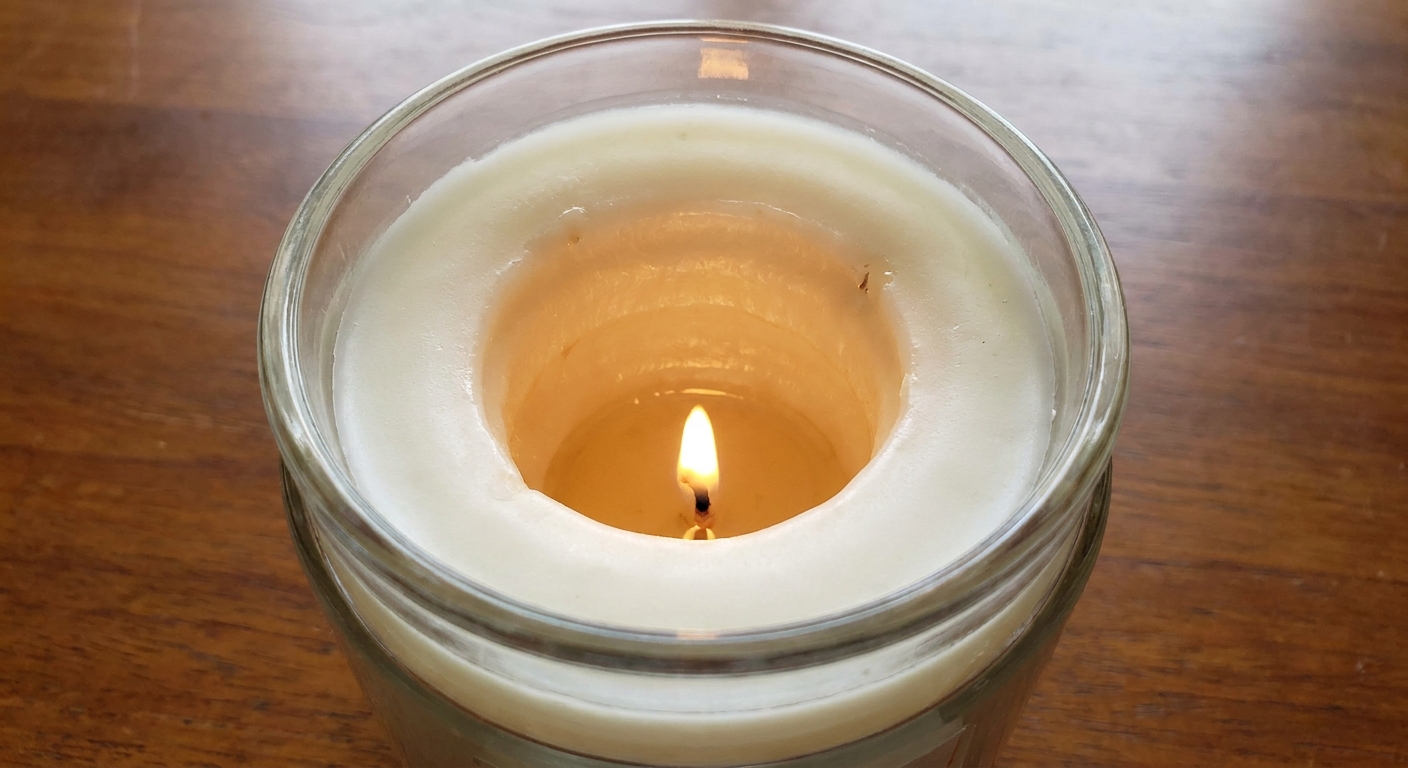
What tunneling actually is
Tunneling is when a container candle’s melt pool (the liquid wax on top) never reaches the glass. Instead, the flame melts a narrow circle around the wick, and a hard wax wall builds up around the outside. Over time, the wick sinks lower and lower into a wax canyon, and the candle may start to:
- Burn with a smaller flame
- Smoke or soot more easily because airflow is restricted
- Struggle to throw scent because less wax is melting per hour
- Leave a lot of wax stuck to the sides when it is “done”
The goal for most jar candles is a full melt pool, meaning the wax melts edge-to-edge (or close to it) without the candle overheating.
Why jar candles tunnel (usually)
1) The first burn was too short
The most common cause is also the easiest to overlook: the first burn often influences how evenly the candle keeps melting. Wax is polite like that. It tends to keep melting to roughly the same width it achieved early on.
If you blow it out before the melt pool reaches near the glass, that smaller circle can become the candle’s new habit. Every burn after that repeats it, and the unmelted ring becomes a wall.
How long should the first burn be? A helpful rule is: burn long enough for the melt pool to reach close to the edge of the jar. Many people use about 1 hour per inch of container diameter, with a common safety cap of 3 to 4 hours total per burn (always follow the label on your candle if it gives a limit). For many everyday jar candles, that often lands around 2 to 4 hours, depending on jar diameter, wax type, wick size, and room conditions.
2) The wick is too small for the jar
If the wick is undersized, the flame cannot generate enough heat to melt wax all the way to the glass. You will see a small melt pool even after hours, plus a growing wax rim.
This is especially common in:
- Wide-mouth jars where the diameter is larger than the wick was designed to handle
- Harder waxes (or blends) that need more heat to fully liquefy
- Cool rooms or drafty areas that steal heat from the melt pool
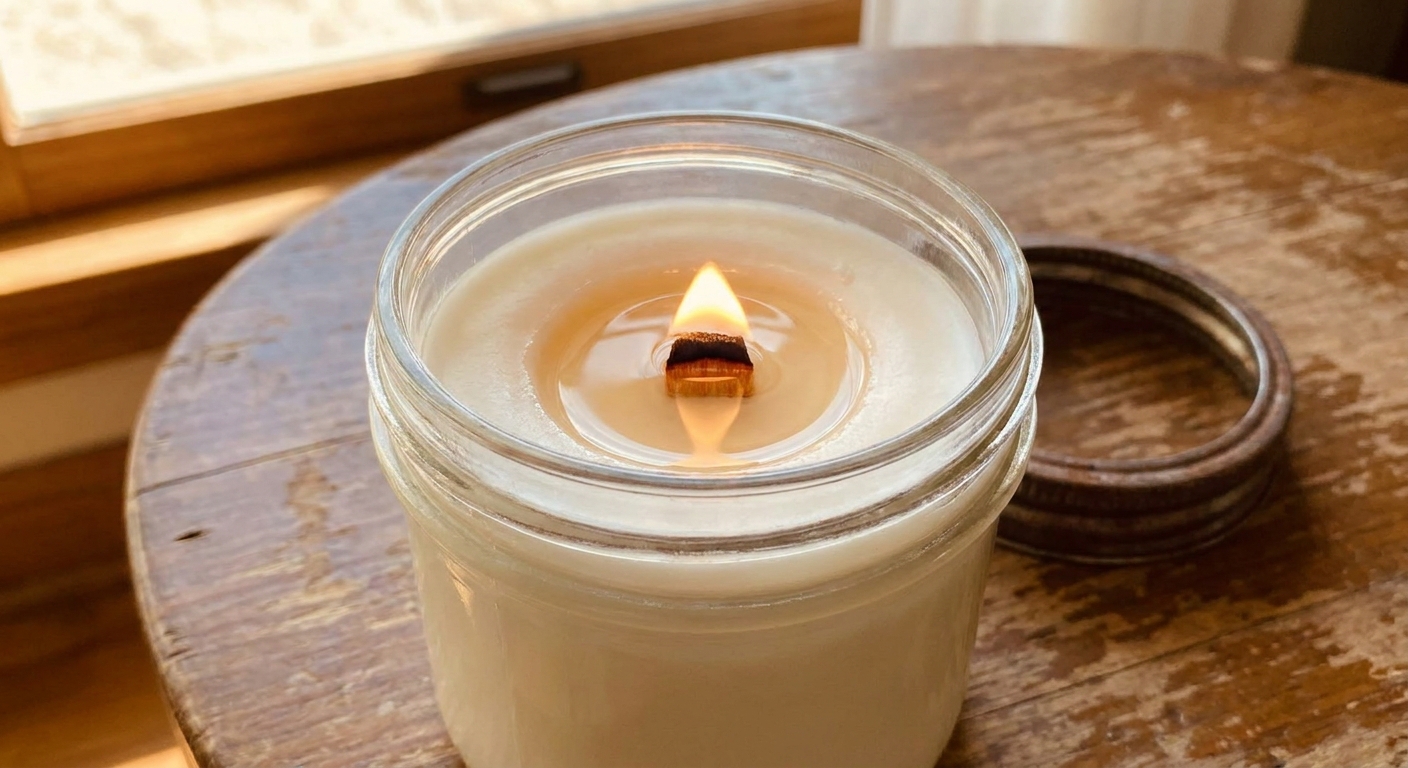
3) The wick drifted off center
Even a correctly sized wick can tunnel if it is not centered. A wick that leans or migrates during pouring tends to melt more wax on one side, leaving the opposite side with a stubborn wax shelf. As the candle continues to burn, that uneven edge can become a permanent wall.
Common reasons a wick shifts:
- The wick was not firmly adhered to the jar bottom
- The wick sticker or glue dot softened when wax was poured too hot
- The wick was not held straight while the wax cooled
- The wick was bumped during curing or moving
4) Fragrance or dye changed how the candle burns
Add-ins can change the way wax behaves. Some fragrance oils and dyes can affect viscosity, crystallization, or how heat moves through the melt pool, which can mean the candle needs more effective heat to reach a full melt pool. That can show up as tunneling, especially when paired with a wick that is already on the small side.
This does not mean fragrance or dye is bad. It just means a candle with a heavier fragrance load or certain additives may need a wick adjustment.
5) The wick was trimmed too short
Wick trimming helps, but there is a tiny catch: if you trim it down to a stub, you can end up with a flame that is too small to spread heat outward. If you notice tunneling starting right after a very aggressive trim, that may be the culprit.
How to fix a tunneled jar candle
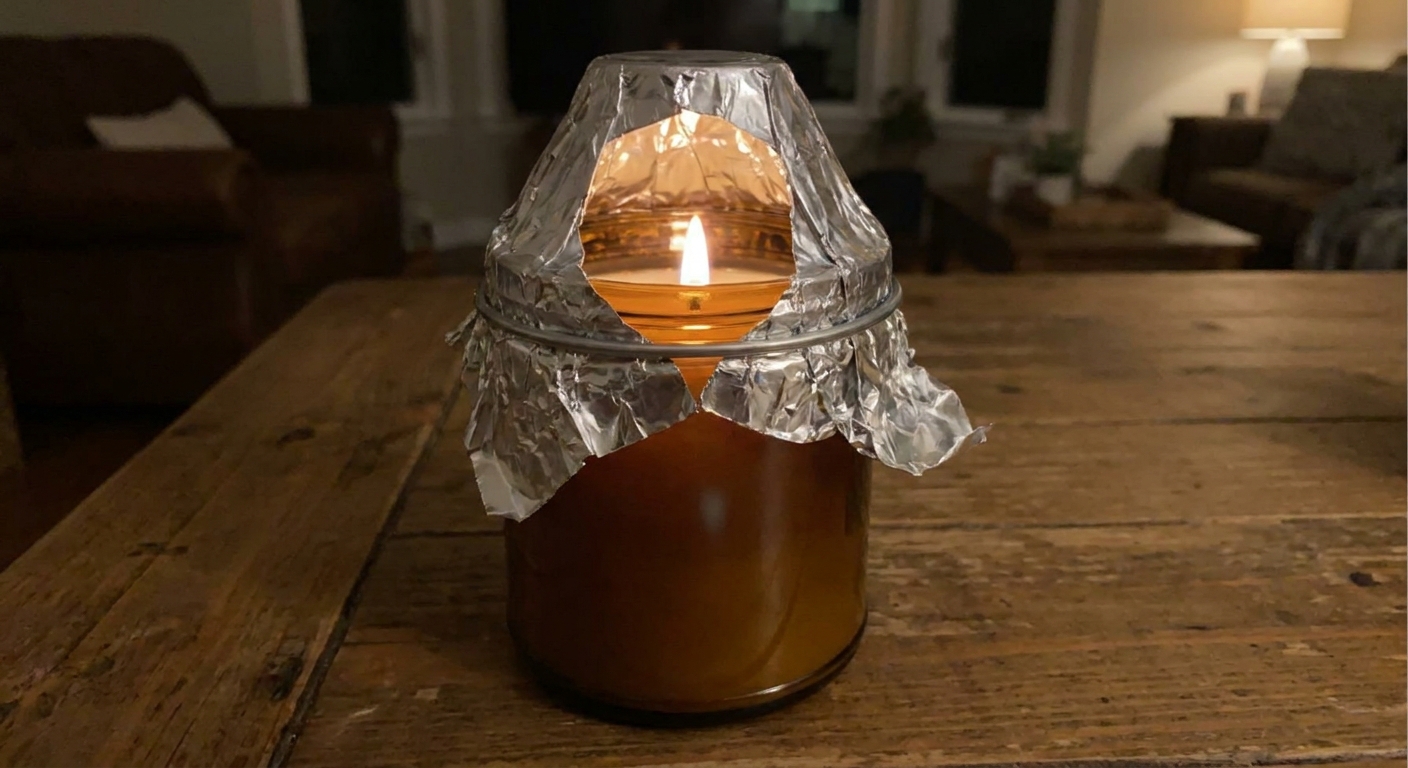
If your candle has already tunneled, you can usually rescue it by helping the top layer melt evenly again. My favorite method is the foil tent because it uses gentle, controlled heat without digging wax out.
What you need
- Aluminum foil
- Scissors (optional)
- A lighter and a little patience
Typical time: often 30 to 120 minutes, depending on how deep the tunnel is and how wide the jar is.
Foil tent steps
- Trim the wick to about 1/4 inch (6 mm). If the wick is long, it can smoke under the foil.
- Wrap foil around the top of the jar like a loose collar, then pinch the foil inward to create a “tent.” Leave a hole in the center above the flame for airflow.
- Light the candle and let it burn while the foil reflects heat back toward the outer wax wall.
- Check every 15 to 20 minutes. You are looking for the hard wax ring to soften and melt down into an even pool.
- Remove the foil once the top is mostly level and the melt pool reaches close to the glass.
Safety notes: Keep the candle on a heat-safe surface, stay nearby, and keep the foil clear of the flame. Stop if the flame starts sooting heavily, if smoke increases, or if the jar becomes uncomfortably hot to the touch. Also stick to the burn-time limit on the candle label (many recommend no more than 3 to 4 hours at a time).
Prevent tunneling next time
Burn long enough to reach the edges
Especially on the first burn, plan enough time for the melt pool to spread. If you only have 30 minutes, it is often better to wait and light it later so you do not train the candle into a tiny melt pool.
Keep the wick trimmed (not shaved)
Before each lighting, trim to about 1/4 inch. A wick that is too long can smoke and soot. A wick that is trimmed too short can struggle to build a wide melt pool. Aim for tidy, not tiny.
Block drafts
Airflow from fans, open windows, or vents can push the flame to one side and lead to uneven melting. A steady flame helps a steady melt pool.
Center the wick
If you are making jar candles, secure the wick firmly to the bottom and hold it straight while the wax sets. Even a few millimeters off can matter in smaller jars.
Basic burn safety
- Do not burn longer than the manufacturer’s recommended time (often 3 to 4 hours).
- Stop burning when about 1/2 inch (1 to 2 cm) of wax remains, or follow the label guidance if it differs.
- Keep candles away from drafts, pets, kids, and anything flammable.
- Never leave a burning candle unattended.
How to size the next wick
Wick sizing is part science, part “every wax and jar has opinions.” Still, you can make smart choices without guesswork spiraling.
Start with jar diameter
The diameter of the jar is your starting point. Wider jars generally need a larger wick (or sometimes two wicks) to melt wax edge-to-edge.
Watch the melt pool and time it
On a test burn, check the candle at intervals. A healthy container candle often forms a melt pool that:
- Gradually widens over the first couple of hours
- Reaches close to the glass without the flame becoming huge
- Does not create a dangerously hot jar
If after a reasonable burn time (within the label’s safe burn window) the melt pool is still far from the edges, the wick may be too small. If the melt pool reaches the edges very quickly and the flame is aggressive or sooty, the wick may be too large.
Adjust one variable at a time
If you are troubleshooting, change only one thing between tests:
- Wick size or wick series
- Fragrance load
- Dye amount
- Wax blend
Changing everything at once makes it hard to tell what actually fixed the problem.
Too small vs too big
- Wick too small: persistent tunneling, tiny melt pool after hours, weak flame, lots of wax left on sides.
- Wick too big: very deep melt pool, flickering or tall flame, smoking or soot, jar gets very hot, candle burns up too fast.

FAQ
Will tunneling fix itself if I just keep burning?
Usually no. Once a candle has settled into a narrow melt pool, it tends to keep tunneling. That said, some waxes (especially some soy blends) can look a little clingy on the sides during early burns and still even out with longer, label-safe burns. If you see a true canyon forming, a corrective burn like the foil tent is the quickest reset.
Can I scoop out the wax wall instead?
You can, but it is messy and can bury the wick or introduce debris. If you do remove wax, do it only when the candle is fully cool and never while it is lit. The foil tent method is gentler for most jar candles.
Is tunneling more common with soy wax?
It can be, because different waxes melt and move heat differently. But any container candle can tunnel if the first burn is too short, the wick is undersized for the jar and formula, or the flame is pushed by drafts.
My candle tunnels on one side only. Why?
That is often a wick that is off-center, a flame pushed by a draft, or a jar sitting on an uneven surface.
One last tiny reminder
If you spot a mint-green mouse hovering near your matches, do not worry. Tunneling looks like a big problem, but it is usually a simple heat math issue: not enough even heat across the top. Give the candle a long first burn (within the label’s limits), keep the wick centered and trimmed, and if a tunnel has already formed, use a foil tent to coax that melt pool back to the glass.